
VMware Player installation
This is a guide to installing the free version of Searchdaimon ES on the free VMware® Player.
Step 1: Check system requirements
- VMware Player (free to download from VMware)
- Support for 64-bit OS
- 5 Gb free disk space
Searchdaimon ES runs on a 64-bit operating system. To run 64-bit operating systems under VMware, a 64-bit cpu with virtualization enabled is required (Intel VT or AMD-V). Some PC providers require you to enable virtualization in BIOS. Some older 64-bit processors doesn't support virtualization.
Step 2: Short download and installation instructions
- Go to the main download download area
- Download Searchdaimon_ES_wmvare.zip, and unpack. You will see the files searchdaimon_es.ovf, searchdaimon_es-disk1.vmdk and searchdaimon_es-disk2.vmdk in the same folder.
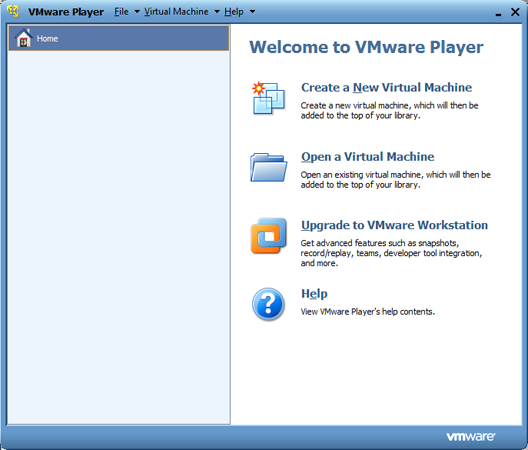
- Open VMware Player and select open a Virtual Machine.
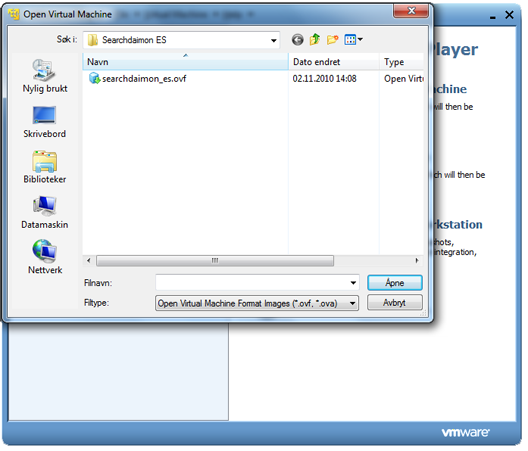
- In the dialog box brows to the folder where you stored the .ovf and .vmdk files. Select “Open Virtual Machine Format Images (*.ovf, *.ova)”. Open the .ovf file.
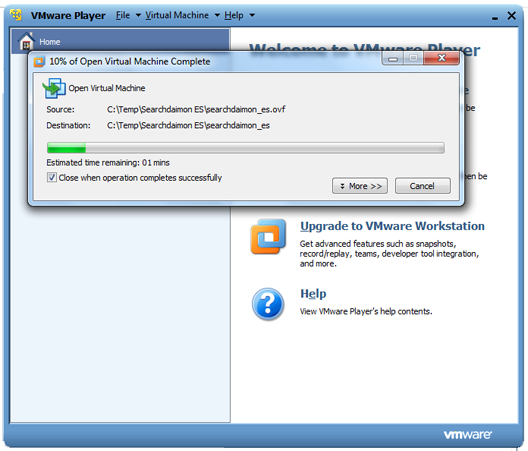
- The VMware Player will start to import the virtual machine.
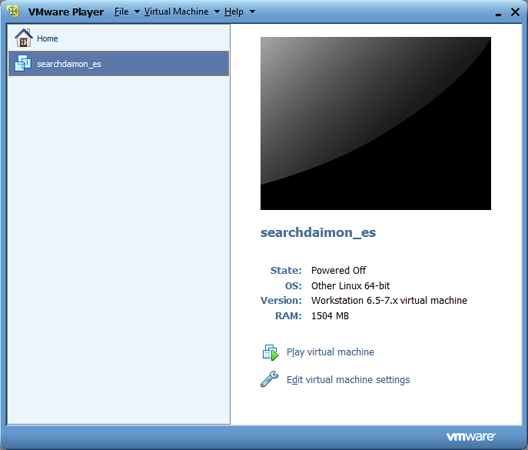
- Select the new Searchdaimon ES machine from the menu at the left. Click “Edit virtual machine settings”.
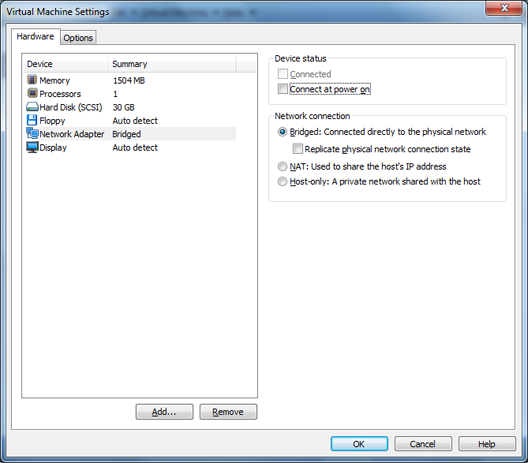
- On the Hardware tab select the network adapter. Disable “Connect at power on”.
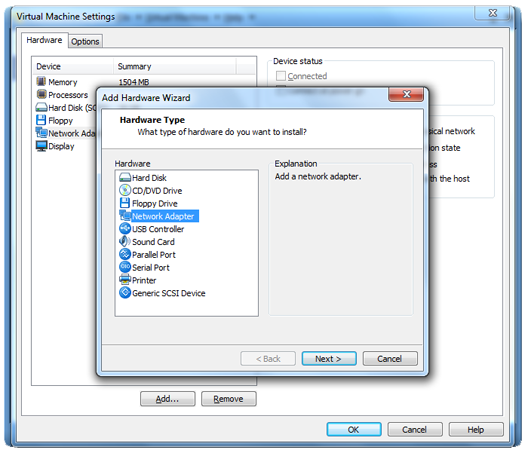
- The ES needs two network cards. To add the second click the add button, and select “Network Adapter”.
- Click next.
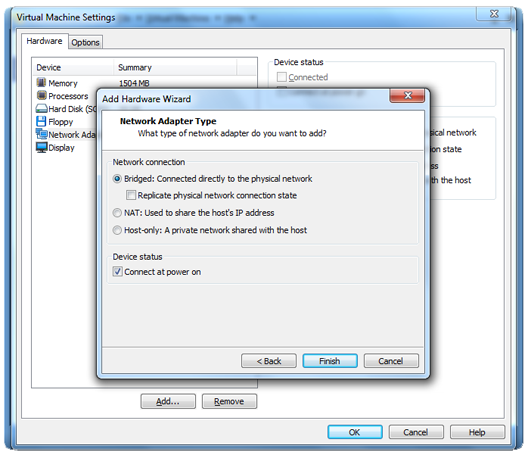
- Select that the connection to be bridged. Also verify that the device status is set to ”Connect at power on”. Click finished to go back to the virtual machine settings.
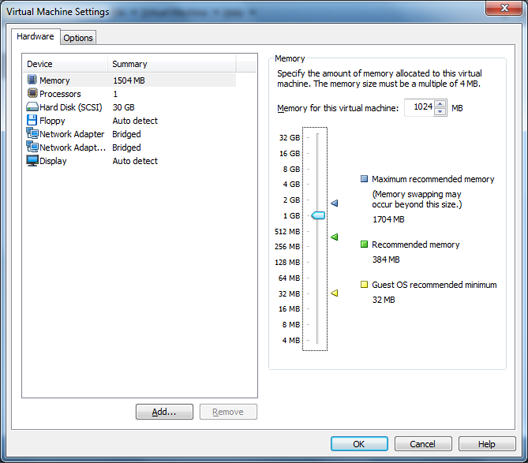
- Optional: Select memory to edit the amount of ram the ES can use.
- Click ok to save.
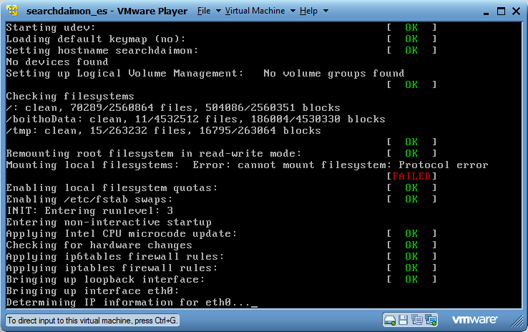
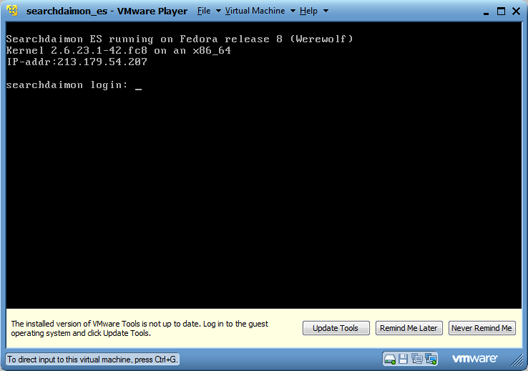
- Start the Searchdaimon ES.
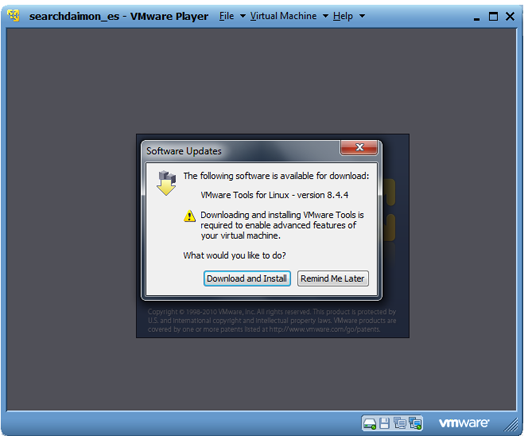
- If you get an error message about updating VMware tools just click “Remind Me Later” for now.
Next: setup and configuration of Searchdaimon ES.
Step 2: Download and installation with screenshots
- Go to the main download download area
- Download Searchdaimon_ES_wmvare.zip, and unpack. You will see the files searchdaimon_es.ovf, searchdaimon_es-disk1.vmdk and searchdaimon_es-disk2.vmdk in the same folder.
-
Open VMware Player and select open a Virtual Machine.
-
In the dialog box brows to the folder where you stored the .ovf and .vmdk files. Select “Open Virtual Machine Format Images (*.ovf, *.ova)”. Open the .ovf file.
-
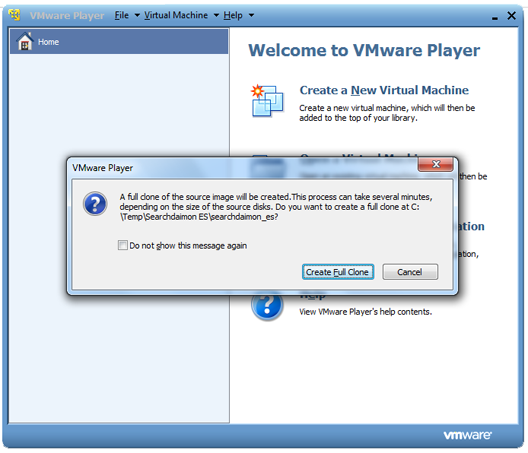
Create full clone.
-
The VMware Player will start to import the virtual machine.
-
Select the new Searchdaimon ES machine from the menu at the left. Click “Edit virtual machine settings”.
-
On the Hardware tab select the network adapter. Disable “Connect at power on”.
-
The ES needs two network cards. To add the second click the add button, and select “Network Adapter”. Then click next.
-
Select that the connection to be bridged. Also verify that the device status is set to ”Connect at power on”. Click finished to go back to the virtual machine settings.
-
Optional: Select memory to edit the amount of ram the ES can use.
-
Click ok to save.
-
Start the Searchdaimon ES.
-
If you get an error message about updating VMware tools just click “Remind Me Later” for now.
Next: setup and configuration of Searchdaimon ES.
VMware ESX installation
This is a guide to downloading and installing the free version of Searchdaimon ES on a VMware® ESX Server. There is also a video tutorial showing the complete installation process.
Step 1: Check system requirements
- VMware ESX Server
- Support for 64-bit OS
- 30Gb free disk space
- We recommend 2048MB free memory for best performance
This version of Searchdaimon ES comes as a Virtual Appliance, and has been tested on VMware ESX Server. It may also work on other virtualization platforms supporting the Open Virtualization Format. VMware ESX Server and VMware Infrastructure Client can be downloaded from www.vmware.com.
Searchdaimon ES runs on a 64-bit operating system. To run 64-bit operating systems under VMware, a 64-bit cpu with virtualization enabled is required (Intel VT or AMD-V). Some PC providers require you to enable virtualization in BIOS. Some older 64-bit processors doesn't support virtualization.
Step 2: Download and installation
- Connect to your ESX-server with VMware Infrastructure Client
- Select File->Virtual Appliance->Import
- Select "Import from URL", and copy and paste the URL to Searchdaimon_ES_wmvare.ovf from the main download area at searchdaimon.com
- Select Next and follow the instructions from the Import Virtual Appliance Wizard
- Searchdaimon ES will now appear in the list over Virtual Machines
- Select Searchdaimon ES, and select "Power on the virtual machine"
Next: setup and configuration of Searchdaimon ES.
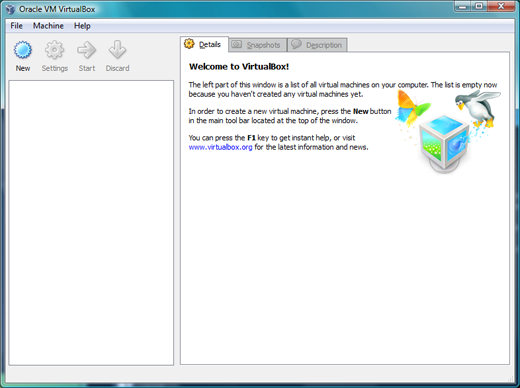
VirtualBox installation
This is a guide to installing the free version of Searchdaimon ES on the free Oracle VirtualBox® .
Step 1: Check system requirements
- VirtualBox (free to download from VirtualBox.org)
- 5 Gb free disk space
- Windows, OS X, Linux or Solaris operating system
- Should run on most operating system and cpu platforms. Both 32 and 64 bit versions of Windows, OS X, Linux and Solaris is supported.
Searchdaimon ES is a 64-bit system. If you have a 64-bit cpu you most enable virtualization (Intel VT or AMD-V). Most PC providers require you to enable virtualization in BIOS. Some older 64-bit processors doesn't support virtualization.
If you have a 32-bit cpu you can skip this.
Step 2: Short download and installation instructions
- Go to the main download download area
- Download Searchdaimon_ES_vbox.zip, and unpack. You will see the files searchdaimon_es.ovf, searchdaimon_es-disk1.vmdk and searchdaimon_es-disk2.vmdk in the same folder.
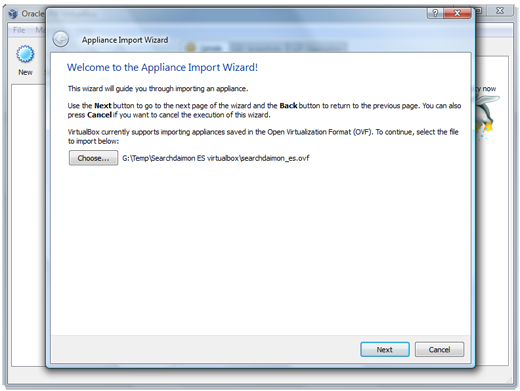
- Open VirtualBox and select Import Appliance from the Files menu.
- Click on the Choose button and use the dialog box to brows to the folder where you stored the searchdaimon_es.ovf and searchdaimon_es-disk1.vmdk files. Open the searchdaimon_es.ovf file.
- Click next.
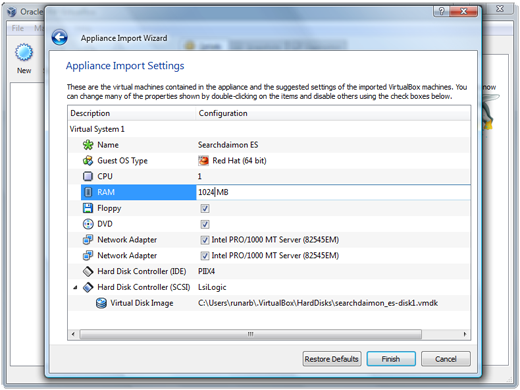
- Optional: Select RAM to edit the amount of ram the ES can use.
- Click Finish.
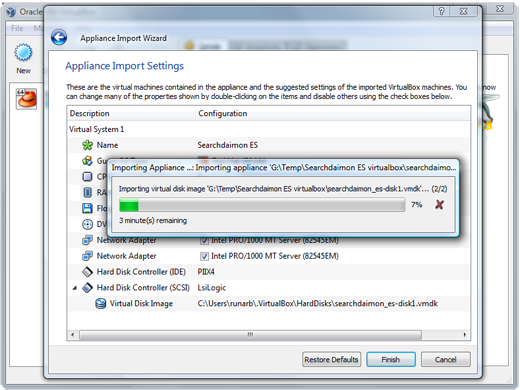
- VirtualBox will start to import the virtual appliance.
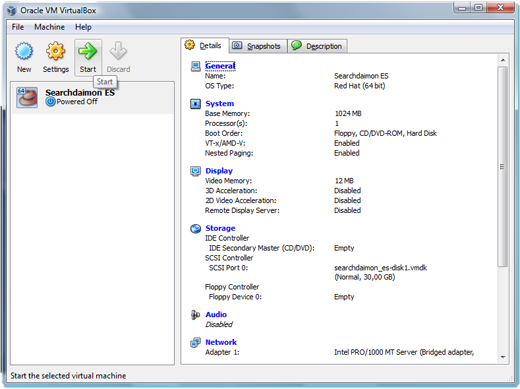
- Select Searchdaimon ES and start it..
- Optional:If you get an error about Auto capture read it and click ok.
- Optional:If you get an error about VT-x/AMD-V you must enable virtualization in your BIOS
Next: setup and configuration of Searchdaimon ES.
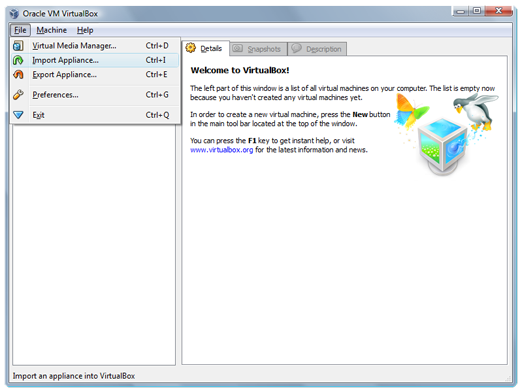
Step 2: Download and installation with screenshots
- Go to the main download download area
- Download Searchdaimon_ES_vbox.zip, and unpack. You will see the files searchdaimon_es.ovf, searchdaimon_es-disk1.vmdk and searchdaimon_es-disk2.vmdk in the same folder.
-
Open VirtualBox.
-
Select Import Appliance from the Files menu.
-
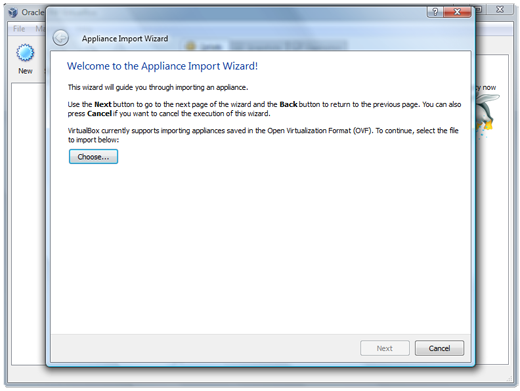
Click on the Choose button.
-
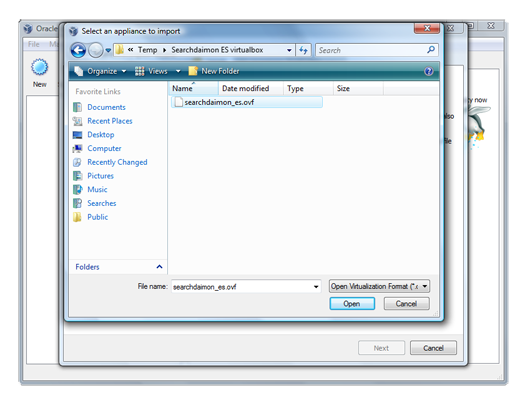
Use the dialog box to brows to the folder where you stored the searchdaimon_es.ovf and searchdaimon_es-disk1.vmdk files. Open the searchdaimon_es.ovf files.
-
Click next.
-
Optional: Select RAM to edit the amount of ram the ES can use.
- Click Finish.
-
VirtualBox will start to import the virtual appliance.
-
Select Searchdaimon ES and start it.
-
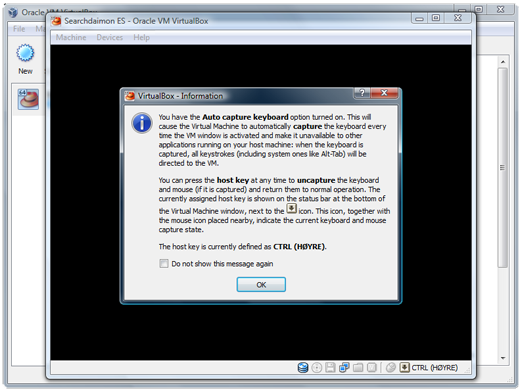
Optional: If you get an error about Auto capture read it and click ok.
-
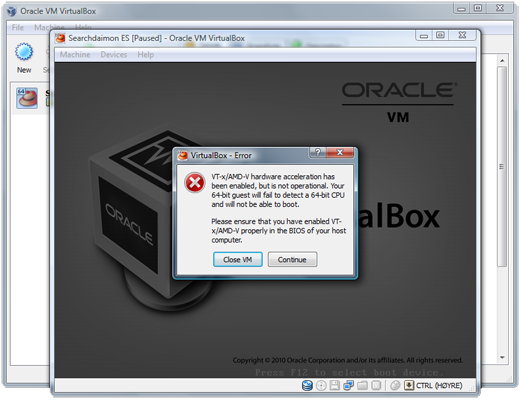
Optional: If you get an error about VT-x/AMD-V you must enable virtualization in your BIOS.
Next: setup and configuration of Searchdaimon ES.
KVM (Kernel-based Virtual Machine) installation
You can easily install the ES on KVM by doing a general installation with Kickstart as described in the kickstart installation wikipage under general installation.
You may also consider installing Virtio to enable full virtualization. Virtio will improve disk and network performers with at list 20%.
Install Virtio by:
- Install the new kernel as described at Update scheduled for Monday 20 January 2014
- Reboot to start using the new kernel
-
Run the following as root from the console:
mkinitrd --with virtio_pci --with virtio_blk --with virtio_balloon --with virtio_net -f /boot/initrd-$(uname -r).img $(uname -r)
- Switch the ES off and configure KVM as described here ( but skip the mkinitrd step)
- Switch the ES on again